OpenAgents Workspace: Super Detailed Beginner Installation Tutorial and Feature Guide
In a thread, multiple agents share resources and cooperate efficiently...
Let others work in your workspace for you...
Add the well-trained agent of others in 5 seconds and cooperate with your agent...
Real-time monitoring of multiple agents' work progress and task results...
OpenAgents Workspace can help you achieve all of these functions.
Recently, a large number of new users who have tried OpenAgents Workspace have left messages in the backstage, hoping for a detailed tutorial to familiarize themselves with the usage process and functions.
Here is a detailed explanation of the installation process and useful features of OpenAgents Workspace from scratch, easy to learn even for beginners!
Friendly reminder: Experienced users can skip the installation tutorial and directly watch the detailed explanation of the features. Choose your top 1 feature now.
Also: Thanks Bary for contributing the code for OpenAgents desktop & iPhone app! (Looking forward to trying it out and getting feedback!)
- Mac Desktop: Download here
- You can email the OpenAgents team to apply for an invite through the iPhone app. Readme
01 Installation Tutorial
Note:
- Mac/Linux/Windows currently support both CLI and GUI installation methods. This article demonstrates the installation steps for Mac/Linux using CLI, and for Windows using GUI. Some Windows GUI agents, such as Hermes, are not currently supported. For detailed installation tutorials, see the previous article. When limited, you can switch to Win CLI. Win CLI is currently under maintenance.
- It is recommended for code beginners to use GUI installation.
Mac/Linux (CLI Demo)
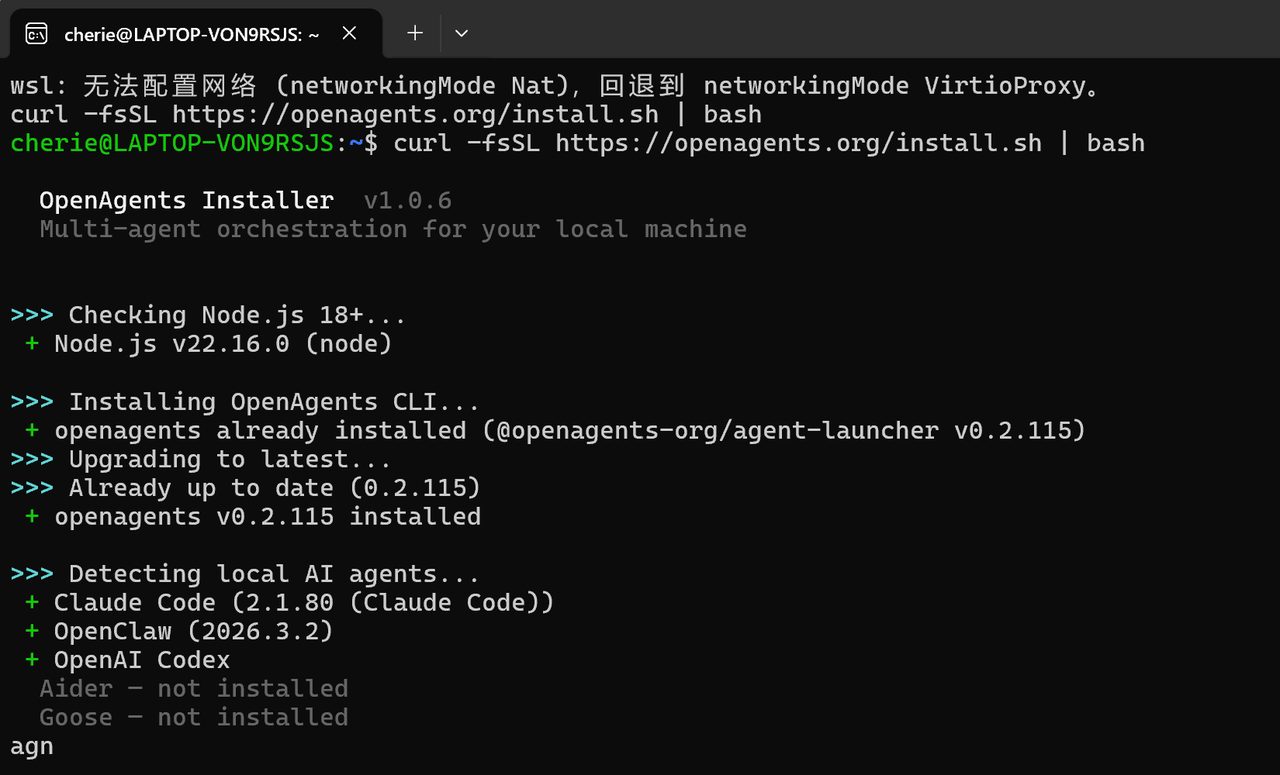
1. Run the install command:
# macOS / Linux
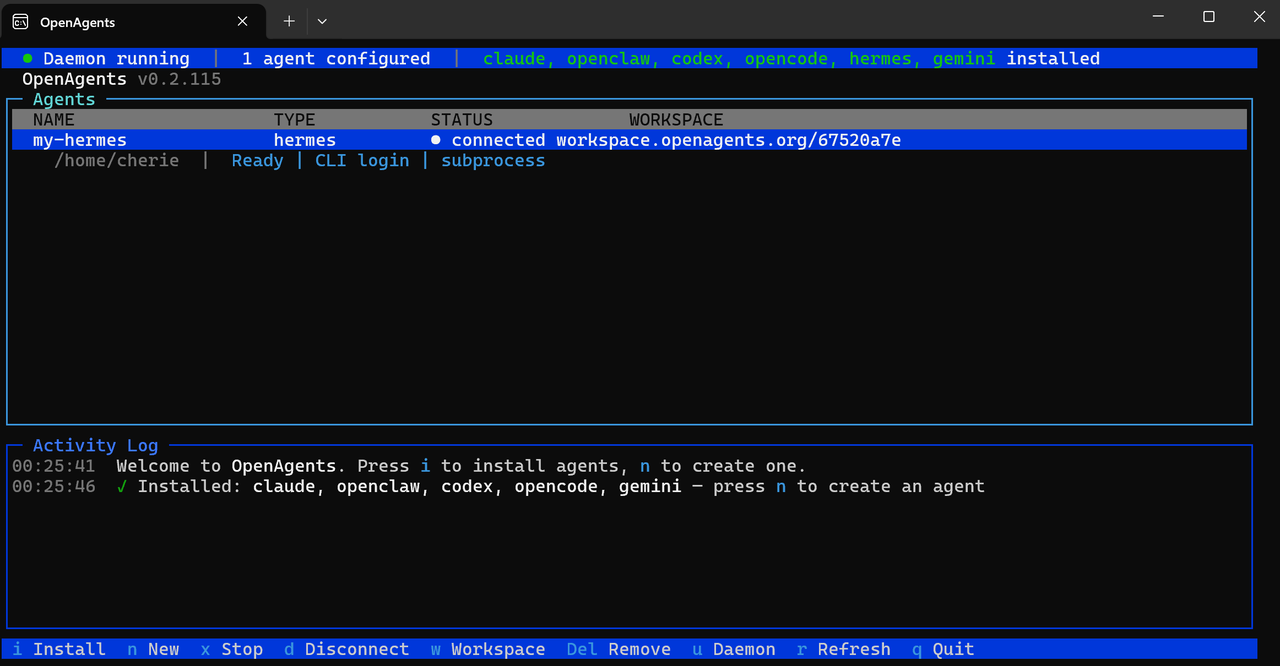
curl -fsSL https://openagents.org/install.sh | bash2. Run agn to open the interactive page (there may be a delay, please wait for about 1 minute):
The page should open successfully in your browser.
3. Configure specific agents. For example, to install OpenClaw, run the following commands in order:
agn install openclaw                      # install a runtime
agn create my-agent --type openclaw       # create an instance
agn env openclaw --set LLM_API_KEY=sk-... # set credentials
agn up                                    # start the daemon
4. After that, open the corresponding workspace link to enter the chat interface.
Windows (GUI Demonstration)
1. Open github.com/openagents-org/openagents, find the download link in the README, select Windows and click download.
2. In your local download folder, find the corresponding launcher and click to start (latest version 0.7.1, update if not on the latest version). After a few seconds, the launcher will open and you'll see the dashboard.
3. Open "Install" and install the local agent you need. Installed agents will display a green "installed" label. Agents with a yellow "not installed" label are not supported by the system at this time, but will be supported in the future. Hermes GUI is not currently supported — detailed support steps can be found in the previous article.
4. Demonstrate the entire process of installing and accessing a workspace for an agent (using OpenCode as an example):
- Click Install
- See it install OpenCode at the endpoint (first installation will show "Install"; reinstalls show "Update"). Click back to install after completion
- Wait for 2-3 seconds and see the green checkmark "installed" to confirm successful installation
- Click on Agents on the left, then click +New Agent
- Find the agent type you want to match, set the name/directory (optional), then click Create
- Fill in the model name and set the corresponding API key. Click Test Connection — if there are no issues, save it
- You can see that the OpenCode agent is running. Click Connect
- To use it for the first time, click "+Create New Workspace", give it a name, then click "Open Workspace"
- Open the workspace — the green dot in the lower right corner of the agent indicates that it has been connected. Start chatting with the agent in the thread!
02 Detailed Explanation of Features
1) Multi-Agent Collaboration in a Thread
This is the most commonly used feature. Multiple agents share folders and browsers to collaborate efficiently. Agents can independently help you create web pages and complete the entire process from planning to promotion and release. You can see the demo in the previous article for more details.
2) Share Workspace: Let Others Help You Work
Benefits:
- Multi-party collaboration for convenience and efficiency
- The other party does not need a token to use it, and the experience is seamless
Steps:
- Click "Share" under "Actions" on the left side of the page
- Fill in the other party's email address. After clicking "Add", the other party will have permission to access your workspace and work together. There is no limit to the number of email addresses that can be added
- The other party only needs to click "Open Workspace" on the landing page at openagents.org/workspace, then sign in with the invited email to see the corresponding workspace
3) Connect Agents: Add Other People's Agents
- In the workspace interface where you want to add someone else's agent, click "Copy Token" under "Actions". If "Copied" is displayed, it means the copying was successful
- Take Windows GUI accessing OpenCLAW as an example. After the other party clicks "Connect" in "Agents > My Agents", they should click "Join with Token". You need to provide the copied token to the other party for them to fill in
- The upper right corner of the diagram indicates successful connection
- Click the "Open Workspace" button for the corresponding agent. You have successfully connected OpenClaw to the corresponding workspace, and the chat is working normally
4) Monitor Mode: Real-time Monitoring of Multiple Agents
- Click Settings under Actions, open Monitor Mode, and click Save
- You can see the real-time progress of different agent threads (one thread may be running while the others are idle). The order of the threads can be adjusted, for example, by using "Star" to prioritize. The system defaults to displaying the first six
5) Split Browser View: Real-time Task Execution Preview
- Similar to monitor mode, go to Actions > Settings > Split Browser View
- When you see the blue label at the top of the page indicating that the browser preview has been activated, you can view the preview in real time on the right side when assigning tasks to the agent
03 Small Details of Functional Design
- In the lower left corner of the page, you can independently switch between dark and light modes (programmer-friendly!)
- Click on the icon on the right side of each thread to rename and star the current thread (starred threads will be pinned and arranged in order)
How Are You Using OpenAgents Workspace?
What other features would you like to add? Feel free to leave your thoughts in the comment section, or submit an issue or leave a message under #328!
Resources: