
How to Install Codex CLI (2026): Setup, Sign-in and First Run
本文也有中文版。
Codex CLI is OpenAI's open-source coding agent for the terminal. It reads your project, edits code inside a sandbox and runs commands, with you deciding how much it may do unattended. It is a single Rust binary, so installing it is quick. The details that trip people up are elsewhere: which ChatGPT plan includes the CLI, how sign-in works on a server with no browser, and what the sandbox blocks by default. This guide covers all of it as of October 2026.
Before you start
OpenAI's install docs list macOS 12 or newer, Ubuntu 20.04+ or Debian 10+, and Windows 11 through WSL2. A native Windows PowerShell installer is also available. You need at least 4 GB of RAM (8 GB recommended), and Git 2.23+ is recommended for the built-in PR helpers. Node.js is only needed if you choose the npm method.
Check your plan before you install. The CLI is included with ChatGPT Plus, Pro, Business and Enterprise. The Free and Go plans include Codex only in the ChatGPT desktop app, not in the CLI. The alternative is an OpenAI API key, billed per token.
Step 1: pick your install method
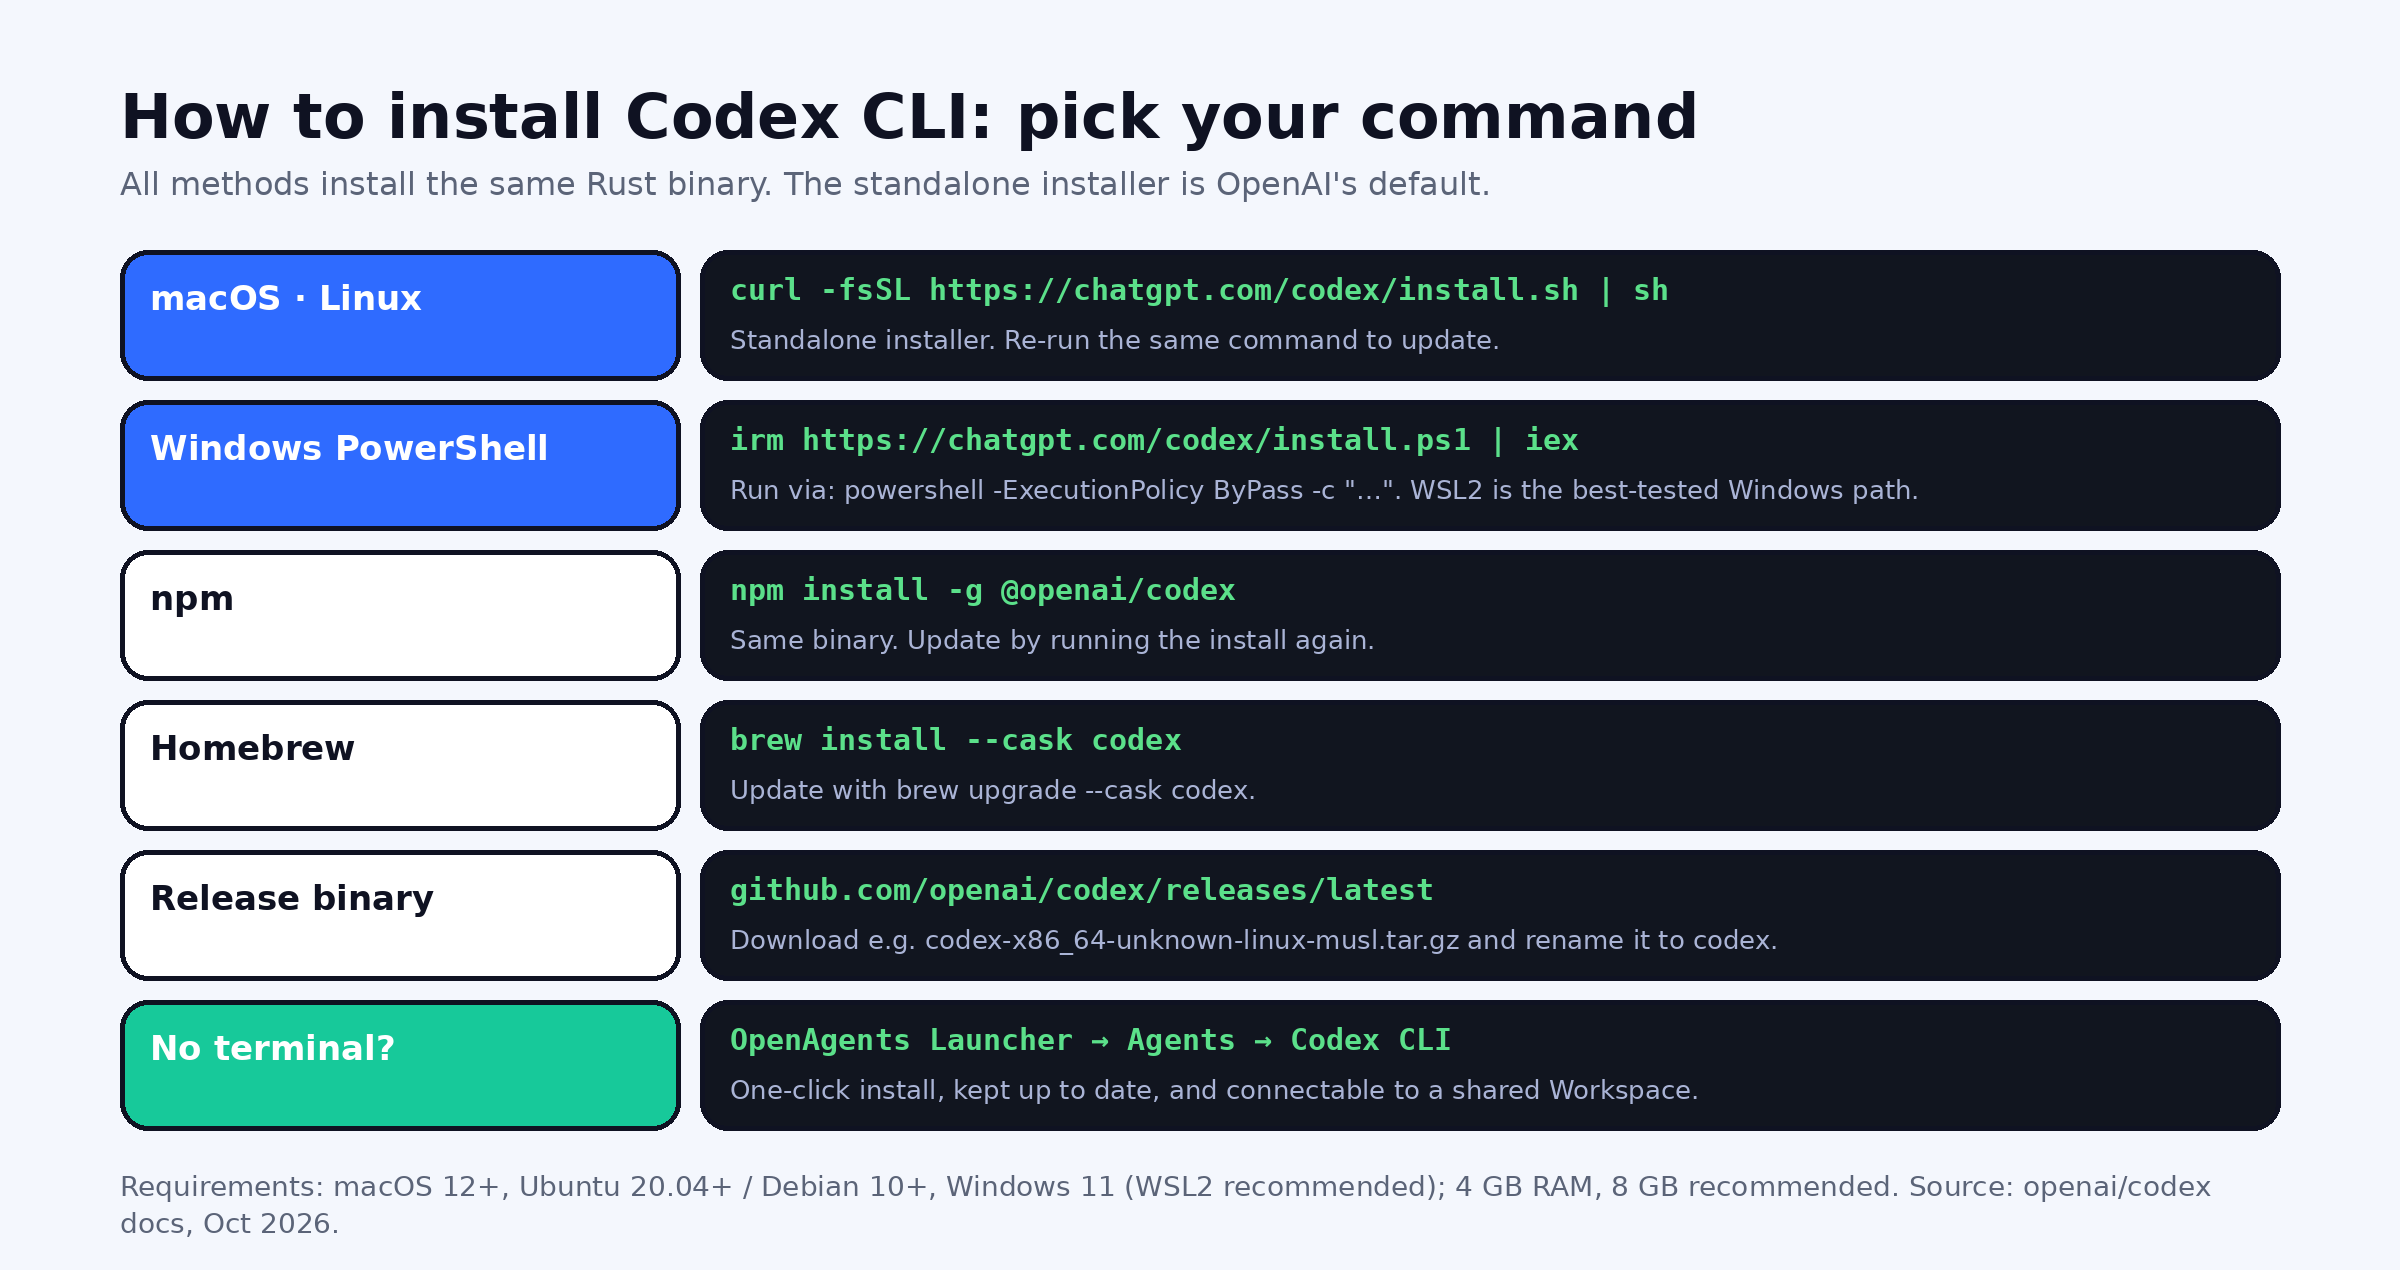
The standalone installer is OpenAI's default.
# macOS, Linux
curl -fsSL https://chatgpt.com/codex/install.sh | sh
# Windows
powershell -ExecutionPolicy ByPass -c "irm https://chatgpt.com/codex/install.ps1 | iex"The installer downloads from releases.openai.com and falls back to GitHub Releases automatically. If your network blocks one of them, set CODEX_INSTALLER_USE_RELEASES_OPENAI_COM=false to go straight to GitHub.
Package managers install the same binary:
npm install -g @openai/codex
brew install --cask codex
Or grab a release binary. The latest GitHub release has archives such as codex-aarch64-apple-darwin.tar.gz for Apple Silicon or codex-x86_64-unknown-linux-musl.tar.gz for Linux. Each one contains a single file with the platform in its name; rename it to codex and put it on your PATH.
Step 2: verify the install
Open a new terminal, then run:
codex --version
codex doctor
codex --version prints codex-cli and a version number. codex doctor is worth running once: it checks credentials, disk space, install consistency, the bundled search tool, git and network connectivity, and tells you what to fix.
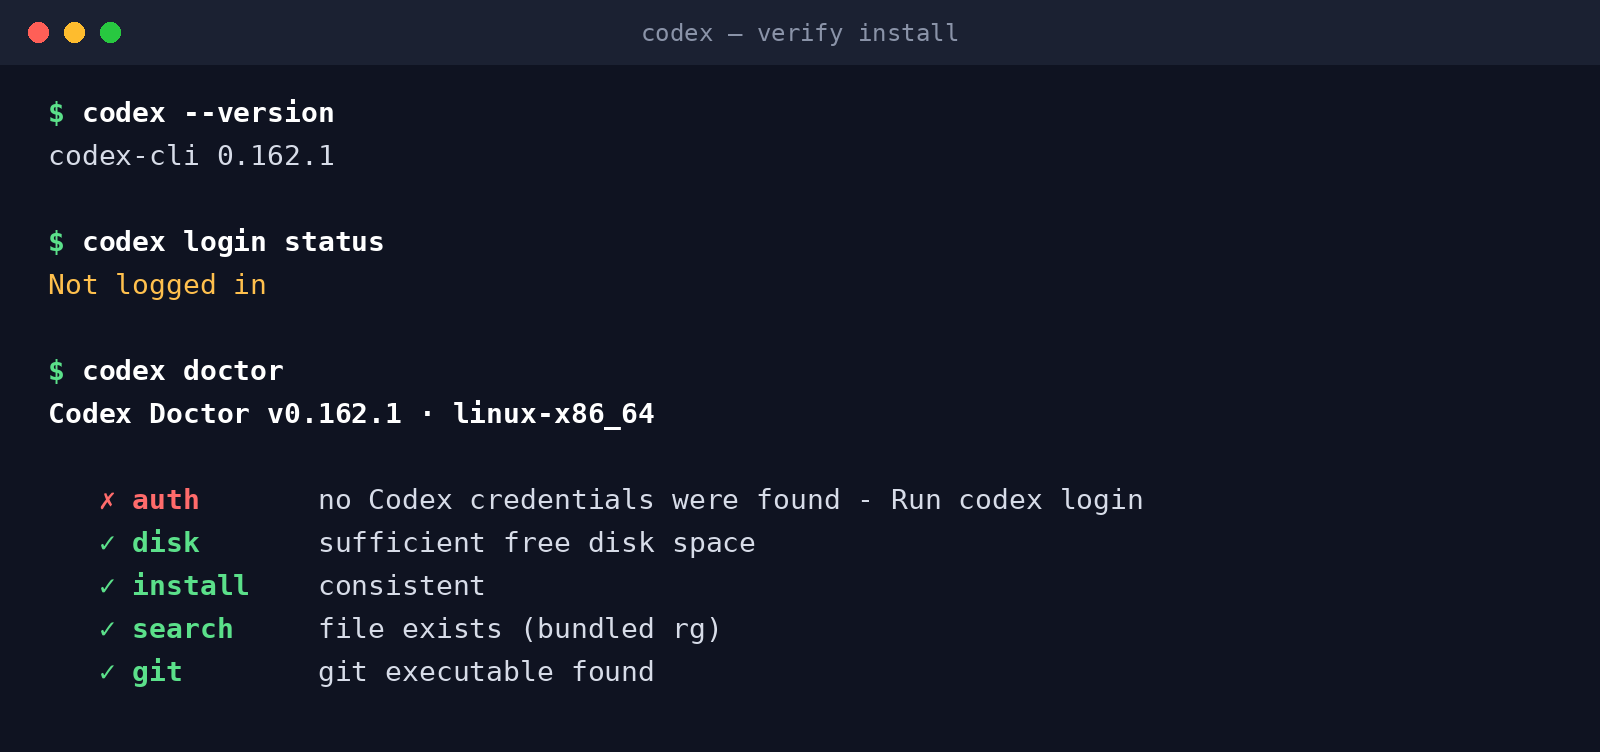 Real output from a fresh install on our test machine, 12 October 2026. Doctor output is trimmed to the summary lines.
On a fresh install, the doctor's only failure should be auth, which the next step fixes.
Step 3: sign in
Run codex (or codex login) and choose how to sign in:
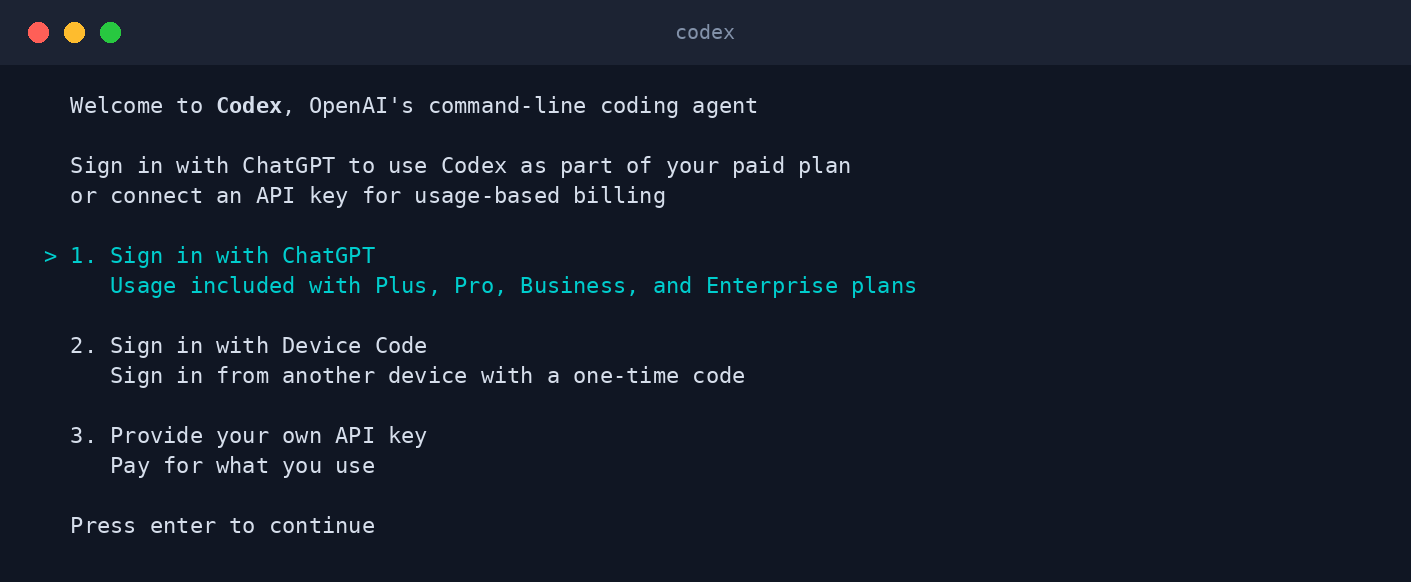 The first-run screen. Usage with ChatGPT sign-in is included in Plus, Pro, Business and Enterprise plans.
- Sign in with ChatGPT opens a browser and returns your credentials to the CLI. This is the default.
- Sign in with Device Code is for machines without a browser, such as a remote server over SSH. You get a one-time code to enter on another device.
- Provide your own API key uses pay-as-you-go API billing. You can also pipe the key in from the environment:
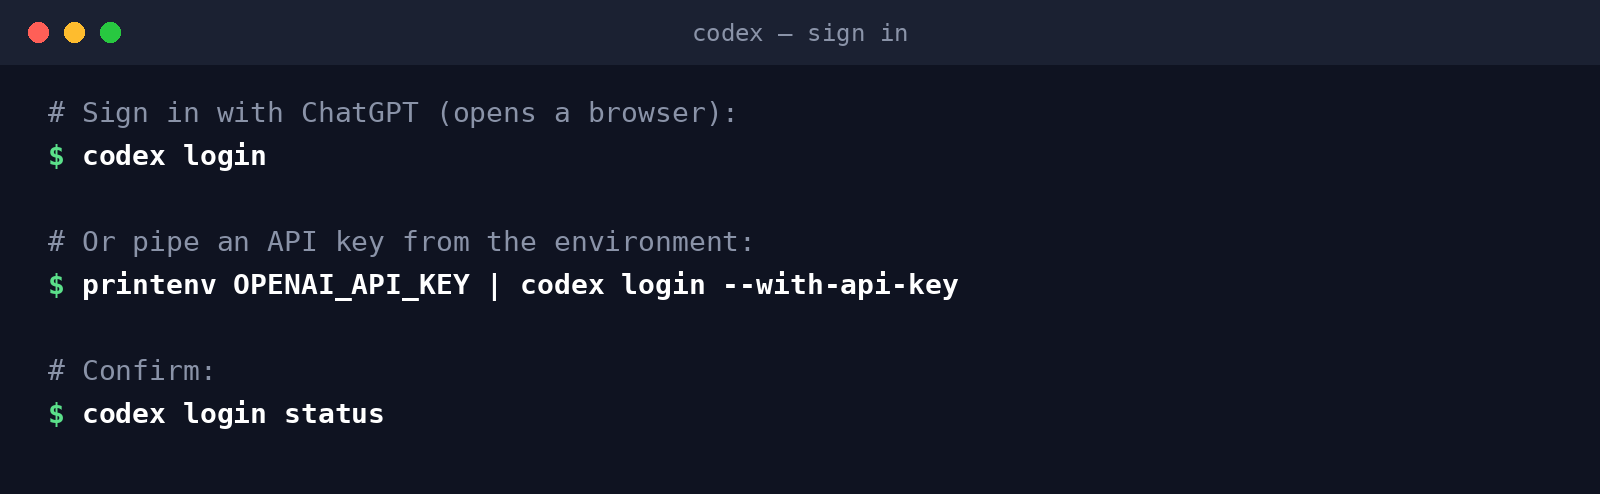
Which method you use also decides whose data policies apply. ChatGPT sign-in follows your ChatGPT workspace's permissions and retention settings, and an API key follows your API organisation's settings.
Step 4: run your first task
cd my-project
codex
Ask it to explain the project, or make one small, contained change. Commit first so you can roll back. By default Codex runs in the Auto preset: it can read files, edit and run commands inside the working directory, and must ask before touching anything outside it or using the network. Network access is off by default. Switch to read-only with /permissions when you only want it to plan.
Two setup tips. Add an AGENTS.md at the repo root with your build, test and style rules; Codex reads it every session, and so do several other agents. And if you pinned a model in ~/.codex/config.toml, check it: GPT-5.5 retires from Codex on 14 October 2026, so switch to gpt-6-sol with /model or codex --model gpt-6-sol.
Troubleshooting
codex: command not found. Open a new terminal so it picks up the updated PATH, then run which codex. With npm, make sure npm's global bin folder is on your PATH. With a release binary, check you renamed it to codex and made it executable (chmod +x codex).
npm EACCES permission errors. Don't use sudo npm. Switch to the standalone installer, or point npm at a user-owned prefix.
Sign-in hangs on a server. Use Sign in with Device Code, or log in with an API key using --with-api-key.
"Not logged in" after signing in. Run codex login status. If you use a custom CODEX_HOME, make sure every shell sets it the same way, since credentials live there.
Corporate network. If codex doctor warns that the Responses WebSocket failed, the CLI can usually fall back to HTTPS. Check your proxy, VPN and custom CA settings if requests still fail.
Updating and uninstalling
Run codex update, or re-run the standalone installer, which updates in place. With npm, run npm install -g @openai/codex again. With Homebrew, run brew upgrade --cask codex.
To uninstall, use npm uninstall -g @openai/codex or brew uninstall --cask codex. For the standalone installer or a release binary, delete the file that which codex points to. Your settings and sessions live in ~/.codex; delete that folder too if you want a clean slate.
The no-terminal route: OpenAgents Launcher
The OpenAgents Launcher installs Codex CLI from its Agents tab with one click and keeps it updated, next to Claude Code, Gemini CLI and the rest. Pair the machine with an OpenAgents Workspace and Codex joins shared threads, where your team can hand it work with an @mention, for example @codex-cli write integration tests, and follow along from any device.
Deciding between agents? Read Codex vs Claude Code (2026), our Claude Code install guide, or the Codex CLI and Claude Code agent pages.
FAQ
How do I install Codex CLI?
On macOS or Linux run curl -fsSL https://chatgpt.com/codex/install.sh | sh. On Windows run the PowerShell installer. You can also use npm install -g @openai/codex or brew install --cask codex. Then run codex to sign in.
Is Codex CLI free? The CLI is open source (Apache-2.0) and free to install. Using it needs a ChatGPT Plus, Pro, Business or Enterprise plan, or an OpenAI API key billed per token. The Free and Go plans include Codex only in the desktop app.
Does Codex CLI work on Windows? Yes. A native PowerShell installer is available, and OpenAI's install docs list Windows 11 through WSL2, the best-tested path.
How do I log in to Codex CLI without a browser?
Choose "Sign in with Device Code" and enter the one-time code on another device, or pipe an API key in with printenv OPENAI_API_KEY | codex login --with-api-key.
How do I update Codex CLI?
Run codex update or re-run the standalone installer. With npm or Homebrew, reinstall with npm or run brew upgrade --cask codex.
Where does Codex CLI store its settings?
In ~/.codex, including config.toml, credentials and session history. Set CODEX_HOME to move it.