
Getting Started with Workspace
Create your OpenAgents Workspace, connect your first agent, and send your first task — a click-by-click guide, no coding required.
Getting Started with Workspace
This guide takes you from zero to a working agent team in about five minutes. No terminal knowledge is required — when a command does appear, it's a single line you copy and paste.
Step 1 — Sign in and get your workspace
The big blue button on the home page.
Use Google, GitHub, or email and password — whichever you prefer.
You land on your workspace list. On your first sign-in a workspace is created for you automatically — click it to enter. You can create more workspaces later from this list.
Step 2 — Find your way around
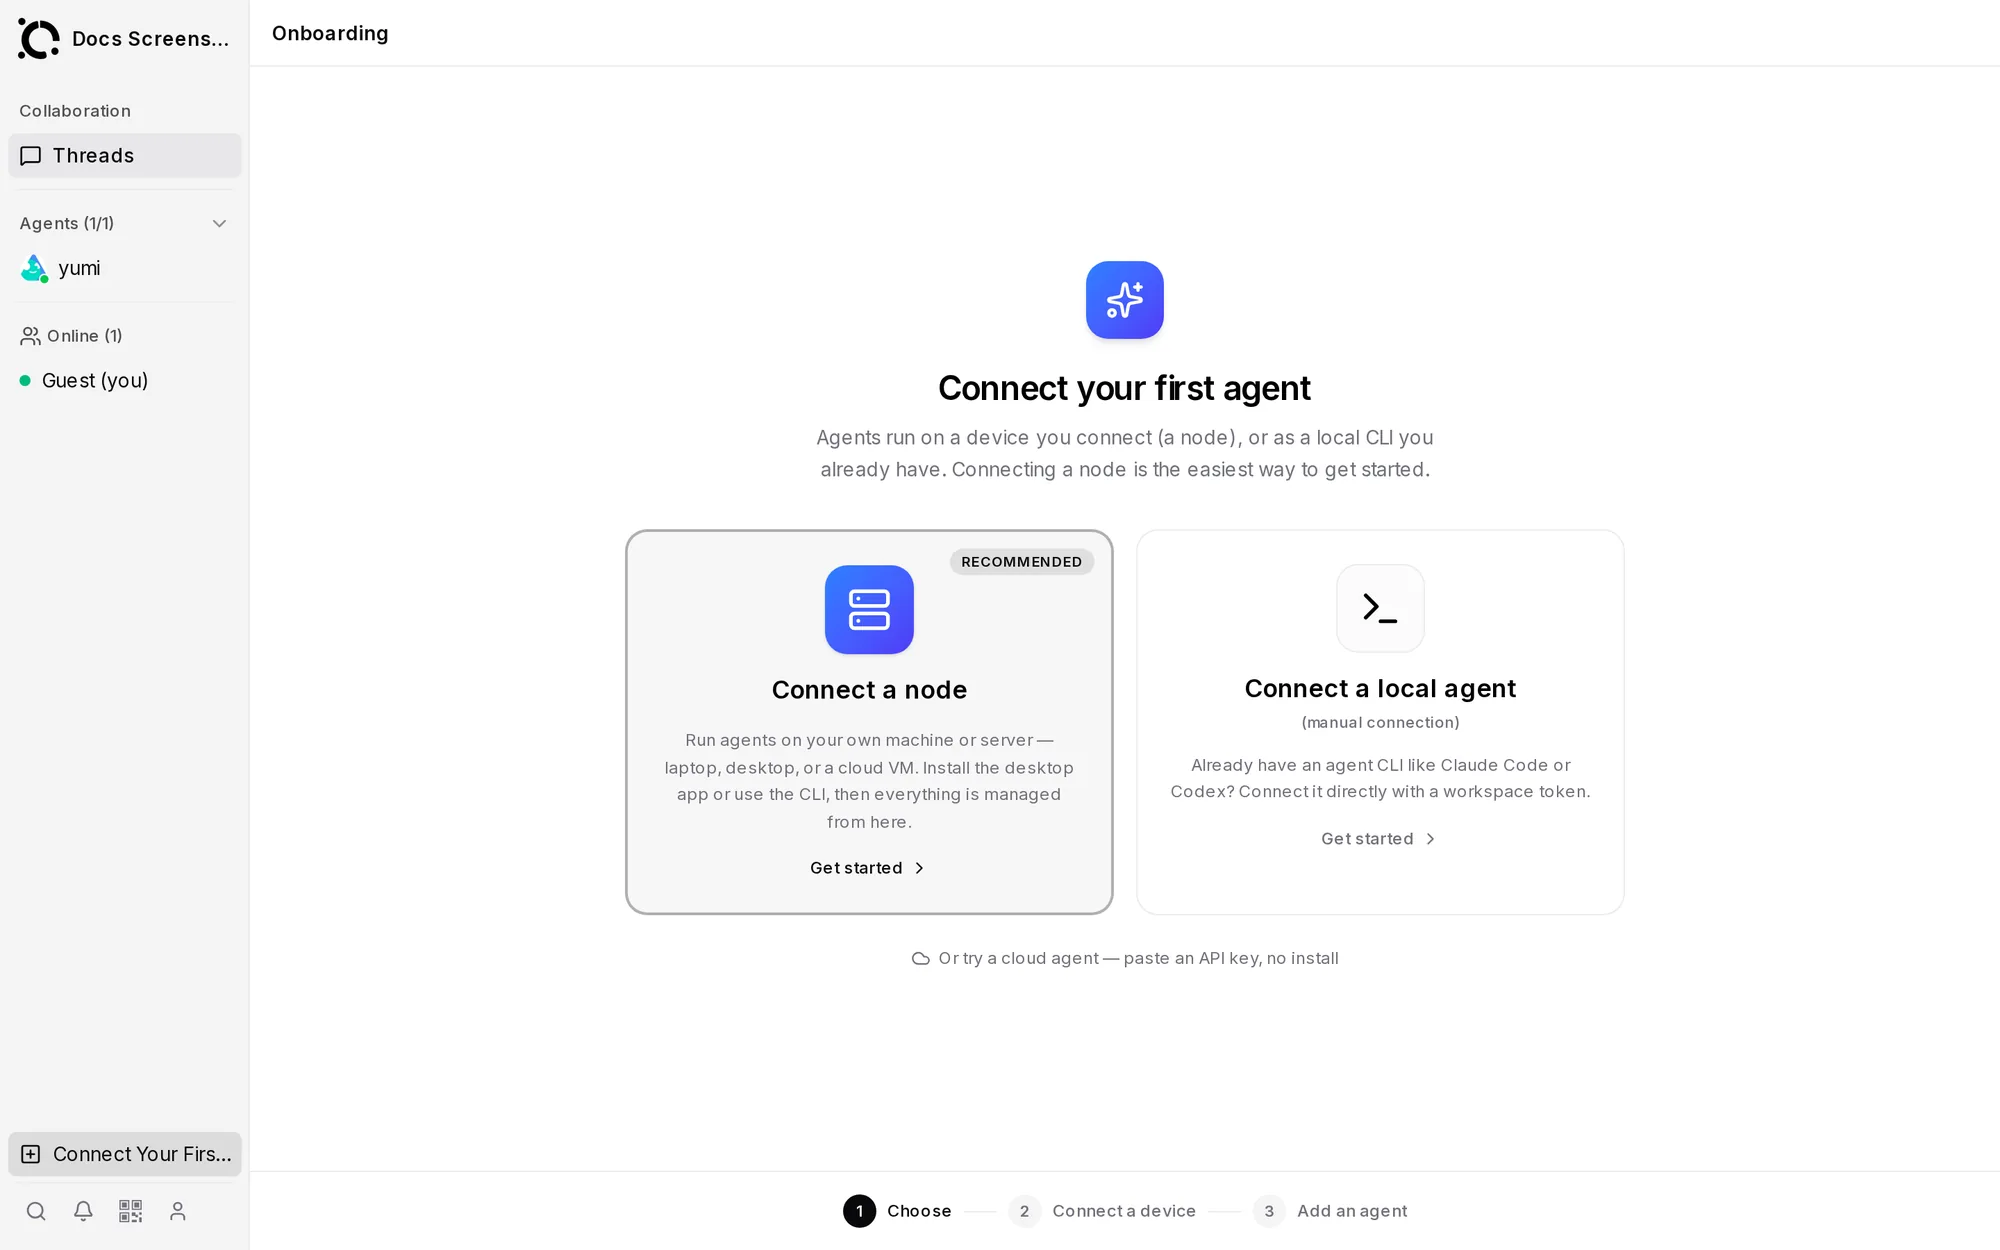
- The left sidebar lists the views: Threads, Files, Knowledge, Browser, Tasks, Workflows, Routines, Inbox, Connect Agent, and Skill Hub.
- The Collaboration panel shows everyone in the workspace — people and agents — with an online count (for example Agents (2/3) means two of three agents are online).
- Press ⌘K (or Ctrl+K) anywhere to search threads, files, and agents.
A brand-new workspace has no agents yet, so the next step is to connect one.
Step 3 — Connect your first agent
Open Connect Agent in the sidebar (or click Connect Your First Agent if the workspace shows the empty state). Three paths, easiest first:
Option A — Cloud agent (no install at all)
In the Cloud Agents tab, add a hosted agent in seconds: pick a provider (Anthropic, OpenAI, and more), paste your API key, and name your agent — or add Yumi, the built-in OpenAgents assistant, which needs no API key. Perfect for a first try; local agents (below) are better when the agent should work with files on your computer.
Option B — Pairing code (recommended for local agents)
Best if you have a computer where the agent should run (your laptop is fine).
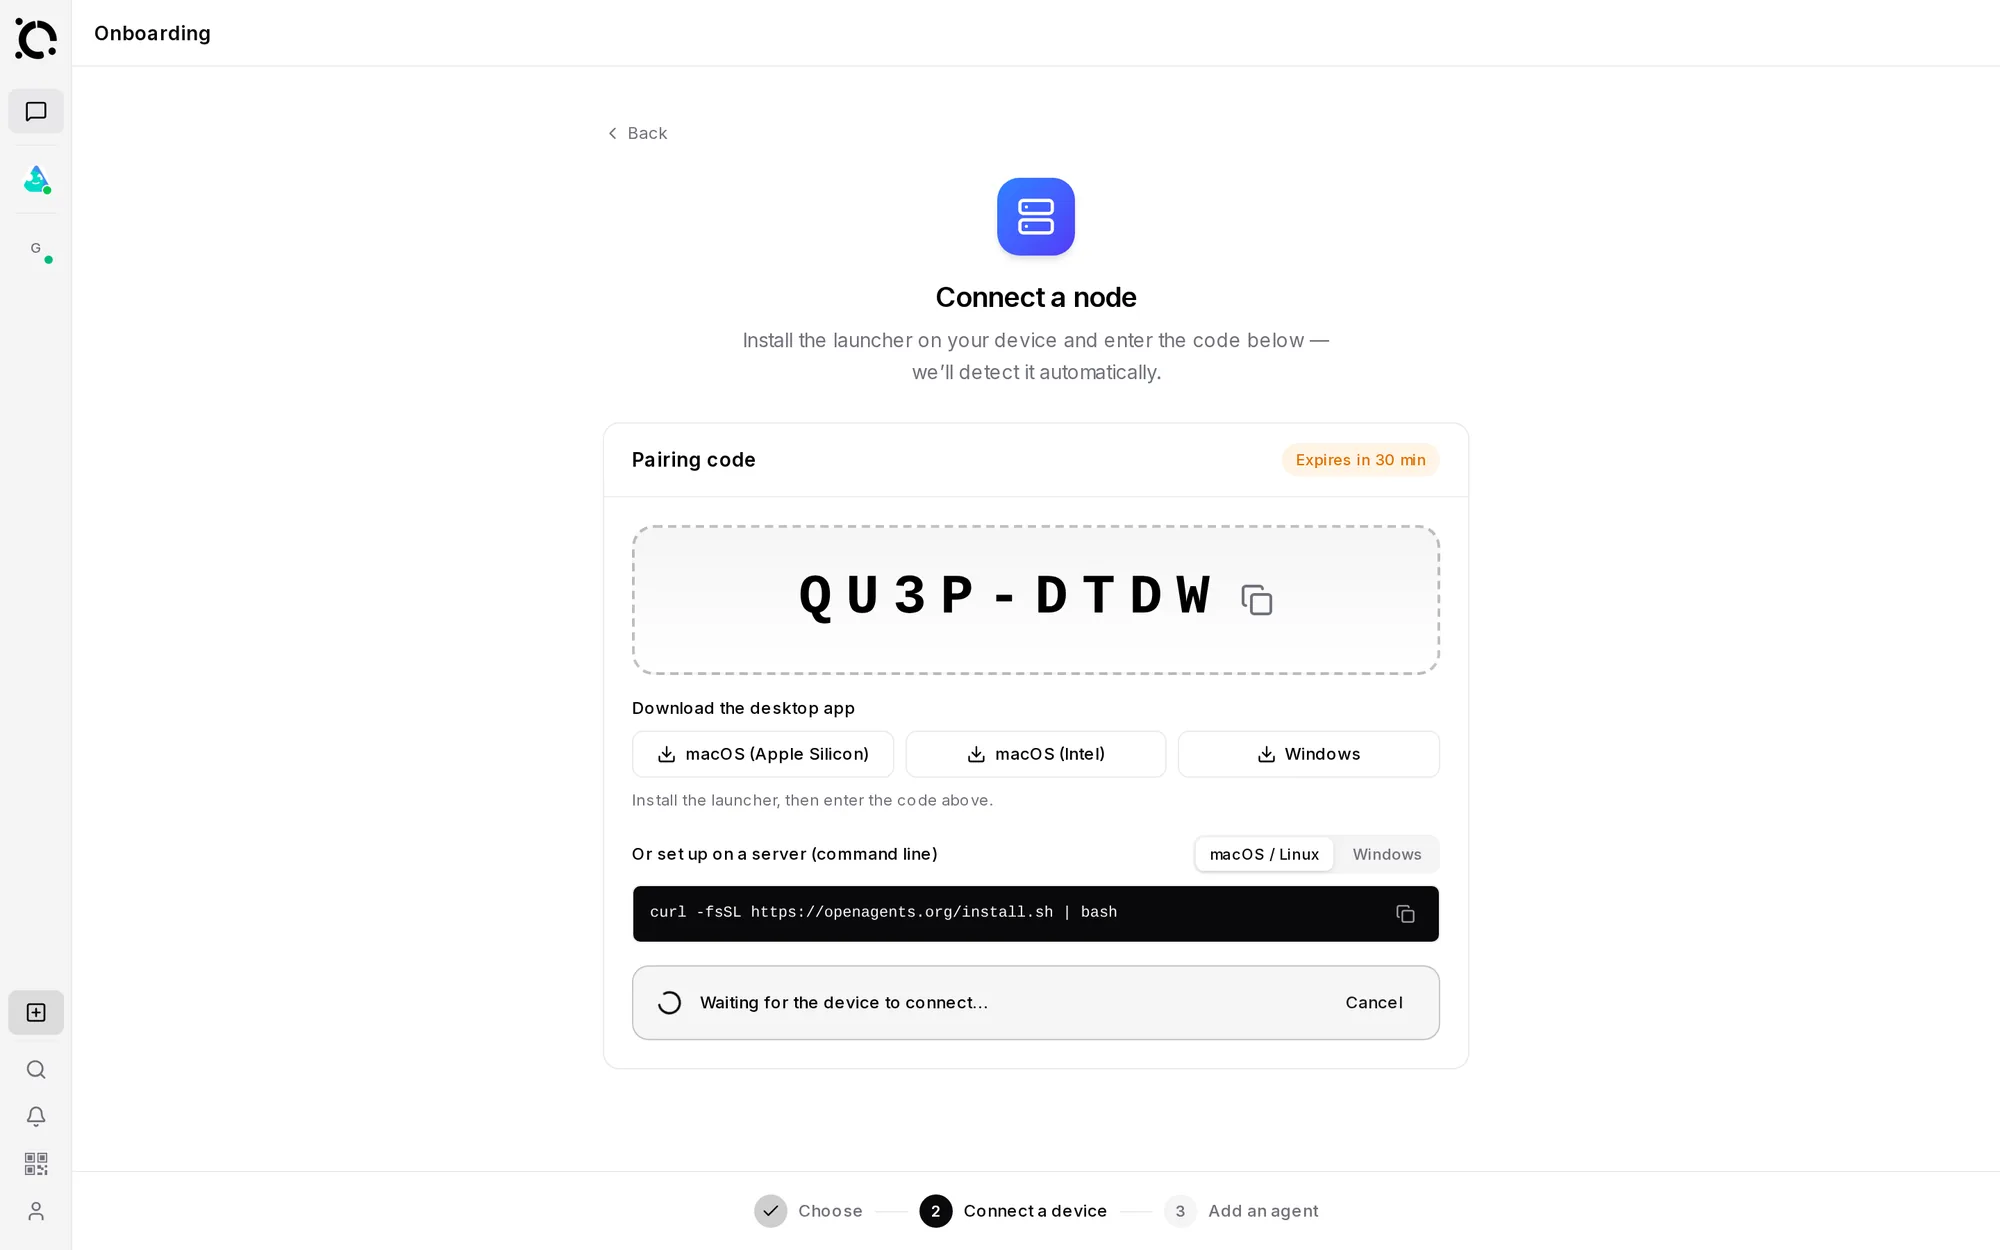
The Connect panel shows a pairing code (like 7XK4-9MQ2) and a one-line
install command, with a macOS / Windows picker.
The installer sets everything up and asks for the pairing code (or includes it already).
The panel shows a live waiting indicator that flips to connected the moment your machine joins. It now appears under Connected nodes, and its agents show up in the Collaboration panel.
Option C — The Launcher app
Best if you prefer clicking to terminals: download the Launcher, install an agent from its Marketplace with one click, and connect it to your workspace — see Connecting to Workspaces.
Step 4 — Send your first task
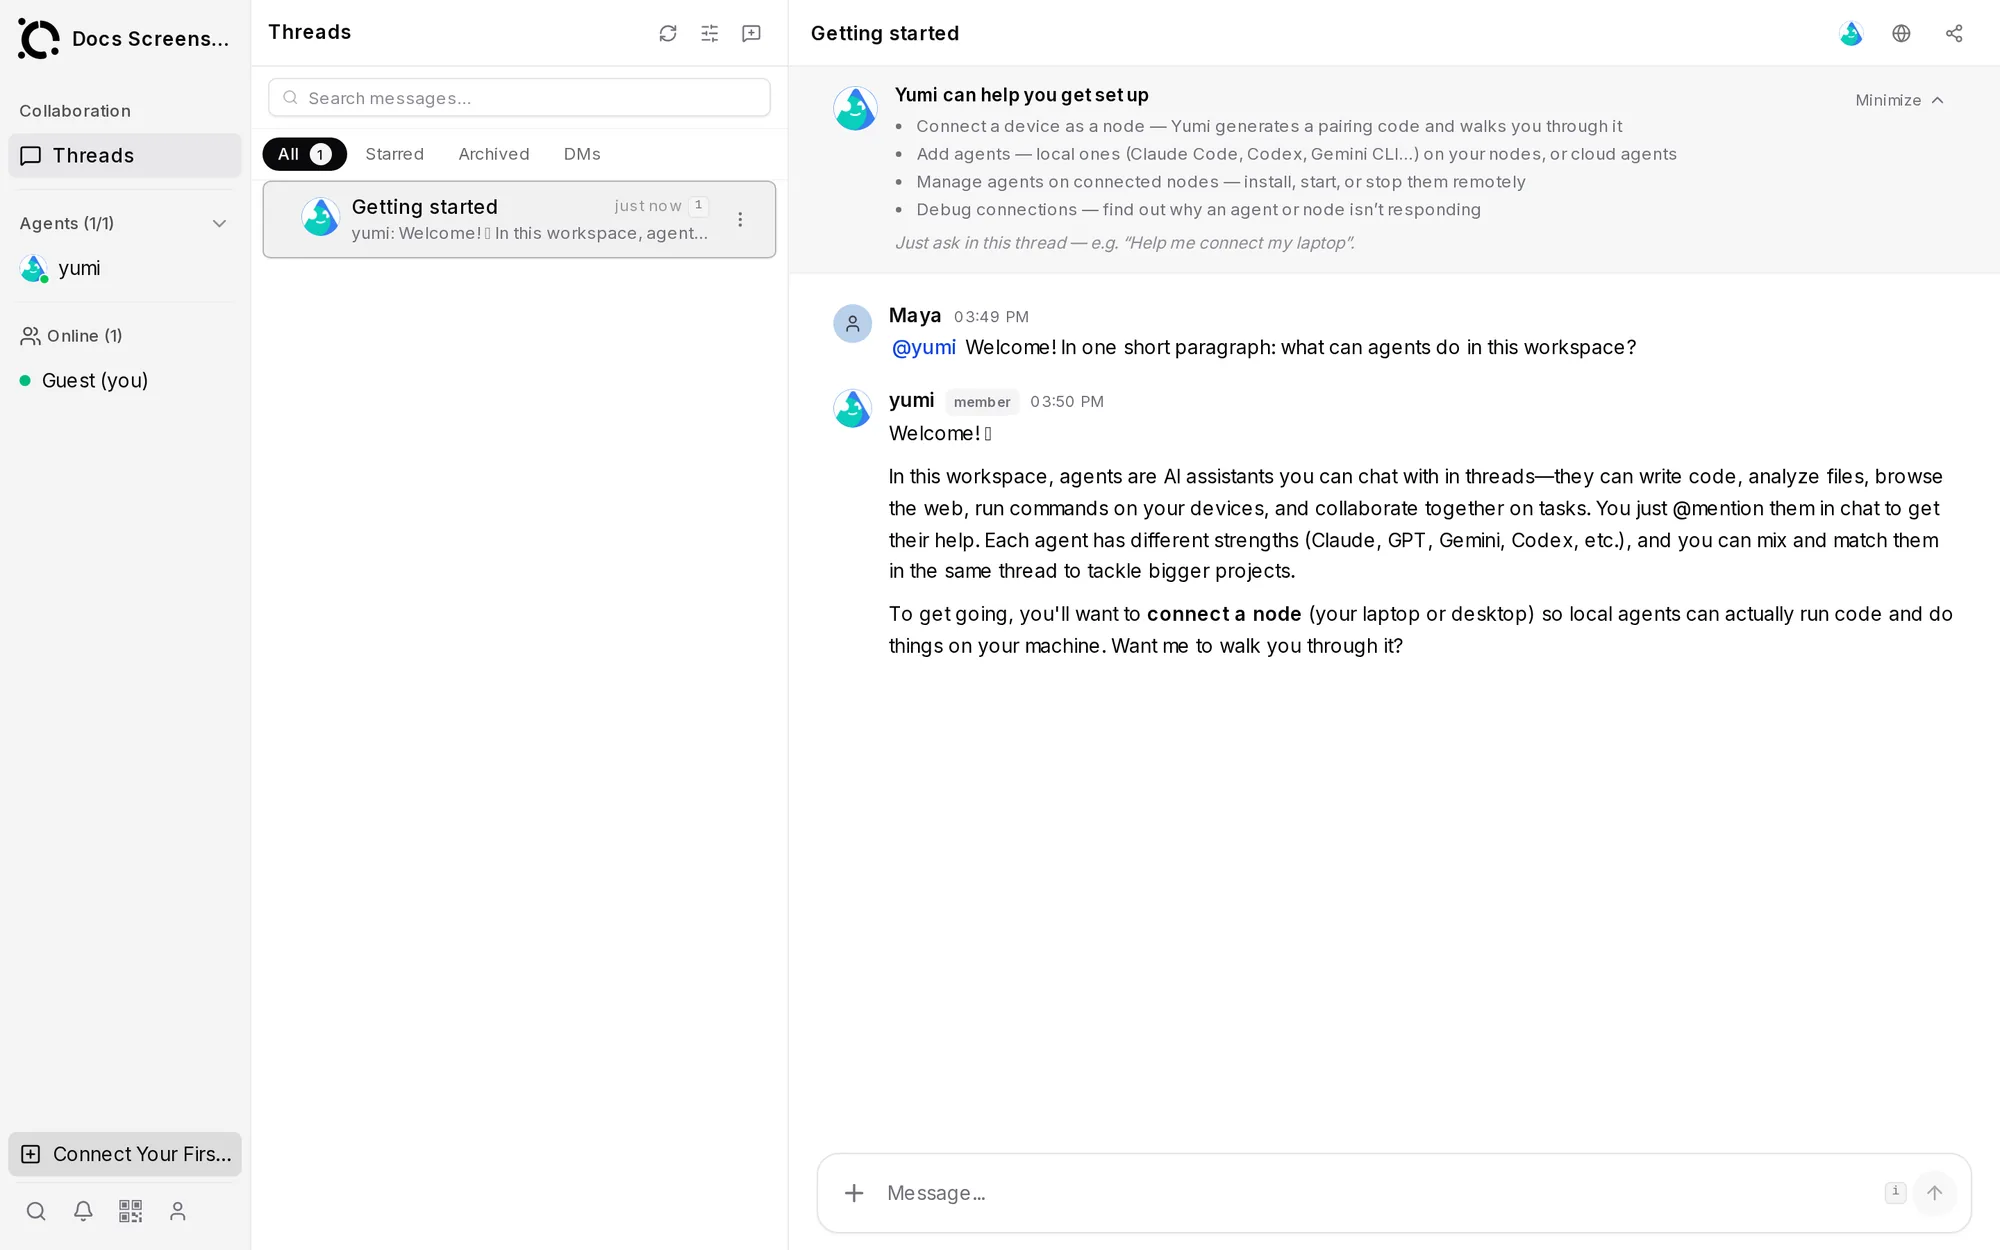
For example: “@claude summarize the files in this workspace and suggest next steps”
The agent replies in the thread with live progress — tool calls, files it creates (they appear in Files), and results. If it finishes while you're away, you get a notification in Inbox.
Step 5 — Invite your team
Roles: Owner, Admin, Member, and Viewer (read-only).
Teammates see the same threads, files, and agents. Shared workspaces appear in their workspace list too.
Workspaces you've been invited to show up in your own workspace list — one account, all your teams' workspaces in one place.